Okay people, we are back to freedom a.k.a GNU/Linux. In this post we'll be discussing on how to install Ubuntu 9.04(Jaunty Jackalope).


![Reblog this post [with Zemanta]](https://lh3.googleusercontent.com/blogger_img_proxy/AEn0k_ubXFrUqdqI5REjWi4q478581QjDLVIK5EoahcD0-Qp4jhaKJBZnX-IILCNAn_weDNMjL5v_x7Z678XV_R1dwd5kye9WT4521vtqdeg7Dxi6UQpsA_uvzsq2nwYwrtgzJJT7h3uUGa0WaILBFiYVqzU=s0-d)
Preliminaries.
Step. 1: First, we'll take a look at the Minimum System Requirements needed for this version of Ubuntu.
please check this link: Go!!
Step 2: If the above dependency is satisfied, then we need to download the installation media. http://www.ubuntu.com/getubuntu/download and download the appropriate version. Then burn it into a CD or DVD.
Step 3: Boot from the CD and do the following steps. We are now going to install Ubuntu. I’m providing you sufficient pictures and descriptions, so that you won’t have any difficulty in installing Ubuntu on your machine.
Installation:
Step 1: Boot from the CD and when you see the following screen, select “Install Ubuntu”. You need to wait for some time as the system needs to prepare for the installation.
 |
 |
Step 2: You will be asked to select a language for the installation process. Select the language (Usually English) and click Next.
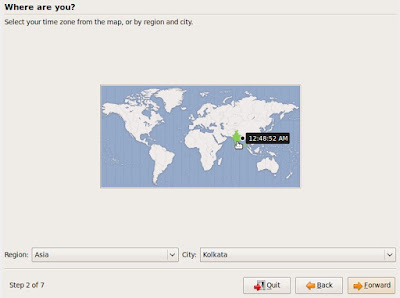
Step 3: Select your time-zone by selecting a city nearby you or selecting the country you are in.
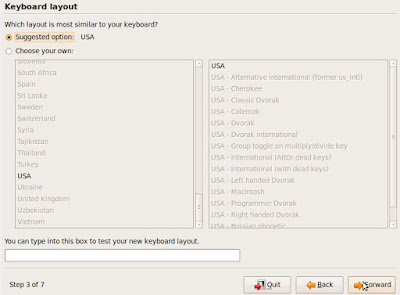
Step 4: Select the Keyboard Layout, in most cases it is US. Click the Forward button. Wait for sometime as the Partitioner is being set up.
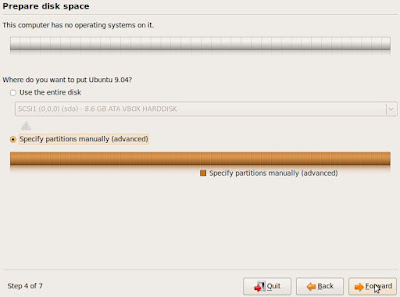
Step 5: Select “Specify Partitions Manually” and click Forward button.
Step 6: Select the required partition and click on “New Partition” button.
Step 7: Enter the required partition size. Make sure that you leave at least 1GB space for Swap area. Select the required file system type(Ext2 or Ext3) from “Use As” menu and set the “Mount Point” as “/”. Click “OK”.
Step 8: Allocate the required “Swap Area”. Remember to set it to at least 1GB. I’ve set it less than 1GB as a matter of shortage of free space. Click the Forward button.
Step 9: In this step, you need to give the login details like username and password. Click the Forward button.
Step 10: Click “Install” button. Now, sit back and relax as the installation takes some time.
Step 11: After the installation is complete, click the “Restart Now” button.
Step 12: After the system reboots, from the Grub loader, select the Ubuntu installation enter your username and password to login to your system.
What are you waiting for??? Explore and Enjoy...!!!
Labels: Ext3, Gnu/Linux, Grub, Linux, Linux installation, Mount, Opensource technologies, Ubuntu, Ubuntu 9.04, Ubuntu 9.04 installation, Ubuntu installation